Wondering how to crop photos on Mac? Then this post is right for you.
Cropping is an essential image editing function, helping to improve the composition of a photo, to emphasize the focus of an image, or to reduce unnecessary parts of a picture.
Learn how to crop photos and videos in the paragraphs that follow to keep the attention on the key elements of the image.
How to Crop Photos on Mac?
Let’s learn how to crop photos and videos on a Mac in six easy steps.
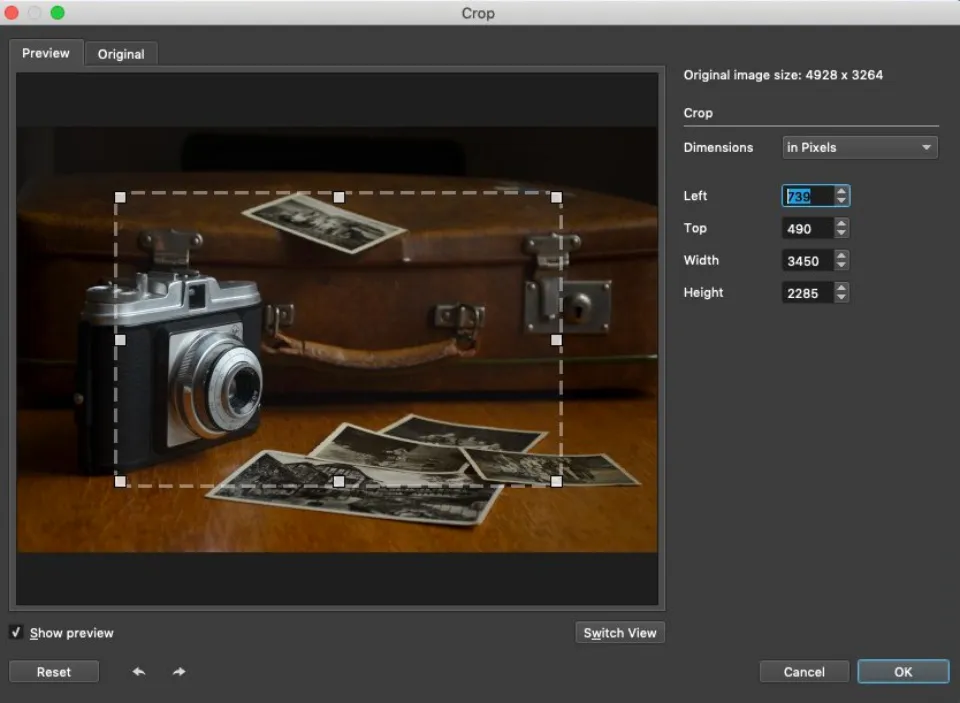
- Open the Photos app on your Open the picture or video you want to crop on your Mac.
- Click the Edit button.
- Click the Crop button above the photo.
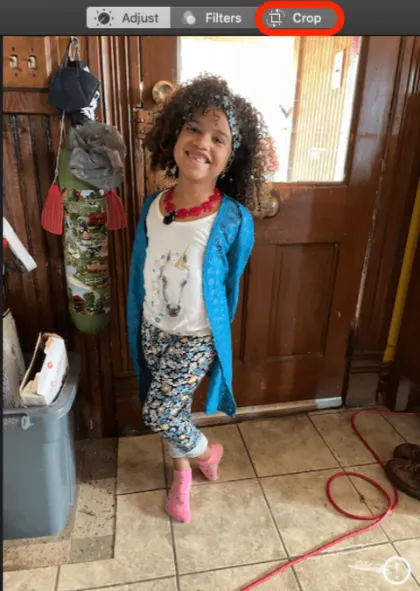
- To eliminate any undesirable portions of a photo or video, drag one or more of the four white corners inward.
- Click the arrow next to Aspect to choose a new, pre-set photo ratio.

- Click Custom under Aspect to set a customized horizontal-to-vertical ratio.
- When finished, click Done to save cropping, or click Revert to Original to remove cropping from your picture.
Tips for Cropping Photos on Mac
If you also use a MacBook or MacBook Pro for your image editing needs, here’s how you can easily crop your images the way you want:
Use the Built-In Apps
When discussing image cropping on a MacBook, the built-in Apple applications come to mind first and foremost. Simply open the image in Preview, select the area you want to crop, and click Tools.
In the tools menu, you will find the appropriate option quickly. The areas you chose in the previous step will be kept in the crop, and the rest of your image will be removed.
A pretty good image editor that comes with every device is Apple’s new Photos app. In addition to offering features like color correction and RAW editing, it also has the ability to crop your images and save the results to iCloud.
While automatically cropping the excess areas, it also enables you to straighten your images. Additionally, if you would like, you can manually crop and align your images. Now that you know how, you won’t need to look up how to crop images in Mac OS X anymore.
Use Photoshop for Deeper Control
If you’d like a little more control over the outcome, crop your images in Adobe Photoshop. Making your selection after clicking on the Crop Tool and pressing Enter to crop an image is easy.
Just select it by clicking on it in the toolbar. The aspect ratio, the grid that appears over the selection, and the image resolution after cropping can all be customized.
Use Luminar Neo for the Best Balance
While using the original Photoshop does give you complete control over your images while cropping, it’s safe to say that doing so if all you need to do is quickly crop or resize your image might be overkill.
Use Luminar Neo by Skylum for the best compromise between usability and advanced features. You can crop your photos with its simple tools, and it offers you a choice of several aspect ratios so you can get the image you want.
While cropping, you can also manually enter the aspect ratio you want to use and straighten your images. The functionality of contemporary AI-based photo editors is fairly sophisticated.
Your MacBook Pro comes with a variety of software editing programs that you can use to crop your images in a variety of situations.
Just keep in mind that, unless necessary for artistic reasons, a cropped image that appears to be cropped doesn’t always produce the best results. The grid with blue dots can be used as a guide when cropping.
You’ll be good to go if you keep in mind the significance of the aspect ratio at which your images are being cropped and the overall composition of your resulting images. Always be mindful of markup.
Looking for more Mac tips for easy use? Continue reading:
- How to Forget a Wifi Network on Mac?
- How to Reset Safari Settings on Mac?
- How to Remove Ample App from Mac?
- How to Reset Trial Period on Mac?
- How to Change Admin Name on Mac?
- How to Download Spotify on Mac?
- How to Eject a USB from a Mac?
- How to Update Roblox on Mac?
- How to Save Images on a Mac?
- How to Drag and Drop on Mac?
Conclusion: How to Crop Photos on Mac
That’s all about how to crop photos on Mac.
A photograph may not always be able to captivate and engage the viewer in its original form.
But it is worthwhile cropping the image properly to eliminate all the pointless, distracting details, as the result is a completely different impression!